
Jekyll is a static site generator. You give it text written in your favorite markup language and it uses layouts to create a static website. You can tweak how you want the site URLs to look, what data gets displayed on the site, and more. Azure Static Web Apps is a service that automatically builds and deploys full stack web apps to Azure from a GitHub repository. The workflow of Azure Static Web Apps is tailored to a developer’s daily workflow. Apps are built and deployed based off GitHub interactions.
“Home is behind, the world is ahead.” - J.R.R. Tolkien -
Getting Started
Choosing a blog framework was probably the hardest part about starting out on wanting to blog, I played around with “What You See Is What You Get” style editors and hosting providers like Wix, Squarespace and GoDaddy before settling on Jekyll. I orginally opted for Jekyll so that I could host this on GitHub Pages and also because I wanted to build it, expand it and host it myself. I ended up buying a template as a starting point since front end dev work is not really my thing and I didn’t want to spend the amount of time needed in building something like this from scratch, buying a template offered a happy medium of being able to get started almost straight away but also giving me the flexibility to edit and customize.
Ruby on Windows
The hardest part here was really getting Ruby installed on Windows so I could start creating this blog. With Jekyll it is pretty easy to get up and running, you can follow the instructions here if you are interested. Jekyll on Windows
The default Jekyll command to start serving your blog is to run the serve command inside the directory your files are stored, below is the command.
jekyll serve
However I kept on getting compile errors, after some investigation I found that my Gemfile and Gemfile.lock needed some editing to work with the version of Ruby I had installed (more on this in another post). After getting that fixed I ended up having to use Bundle to execute my Jekyll commands like the below.
bundle exec jekyll serve
Azure Static WebApps
Once I got this up and running locally to a point I was happy with it was time to host this, I had recently been playing around with GitHub Pages but decided in the end to host this on Azure Static WebApps, I’ll do another more indepth write up on hosting Static Websites in Azure as there are a few options that can be used.
To get started on hosting a Jekyll Static webApp on Azure Static WebApps you need two things:
- A GitHub account
- A Microsoft Azure account
With Azure Static WebApps you also get a free certificate so no need to purchase your own (although there might be options when the service is out of Preview to bring your own certificate should you wish to).
With your code in GitHub it’s pretty straight forward to get this into Azure with a few clicks in the Azure Portal and some editing to a GitHub Actions YAML file.
Deployment
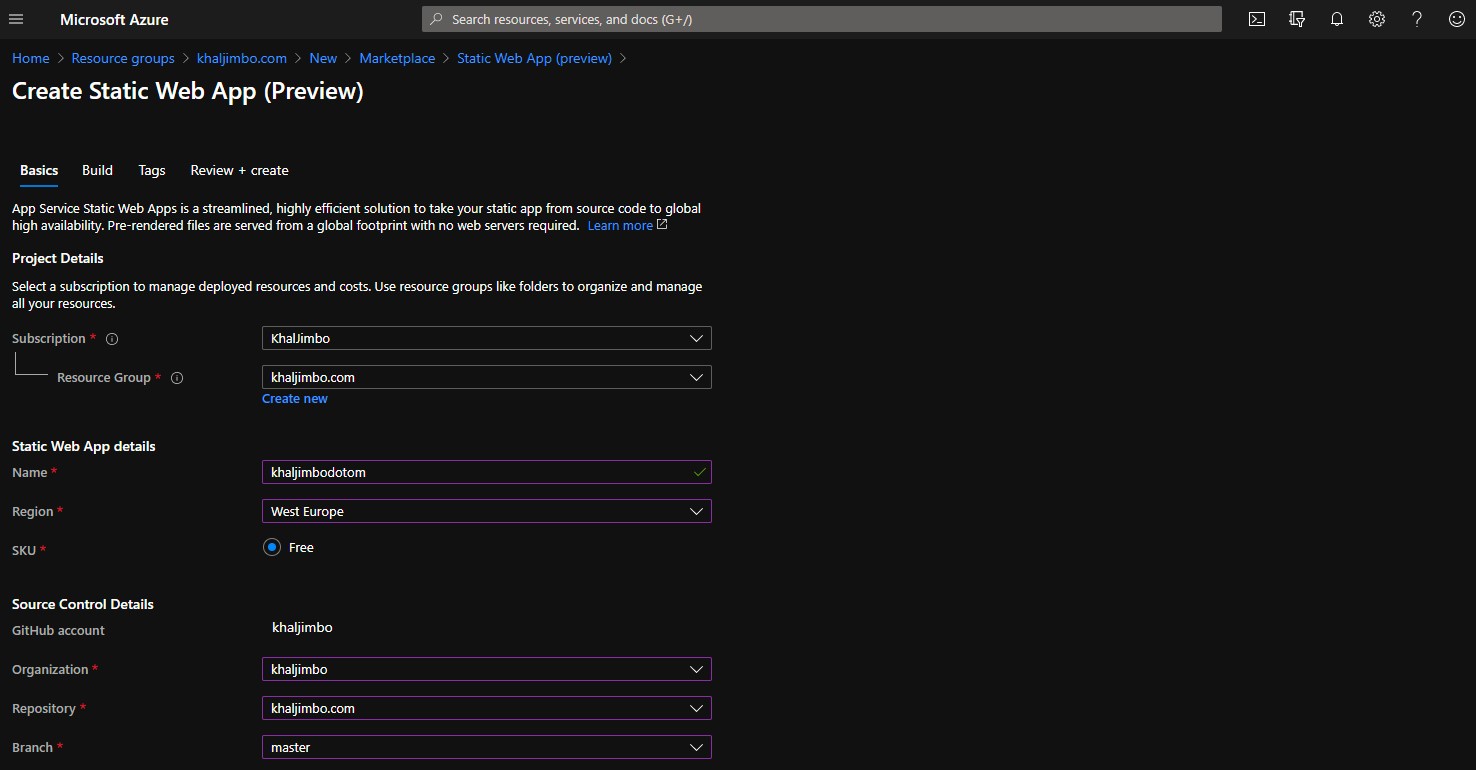
In Azure, search for the Azure Static WebApp resource to get started, choose the Subscription, Resource Group, Name of your WebApp and the Region in which you want it to be deployed. Click on the “Sign in with GitHub” button to choose the repo that contains your Jekyll site and the branch on which you want your deployments to be based on.
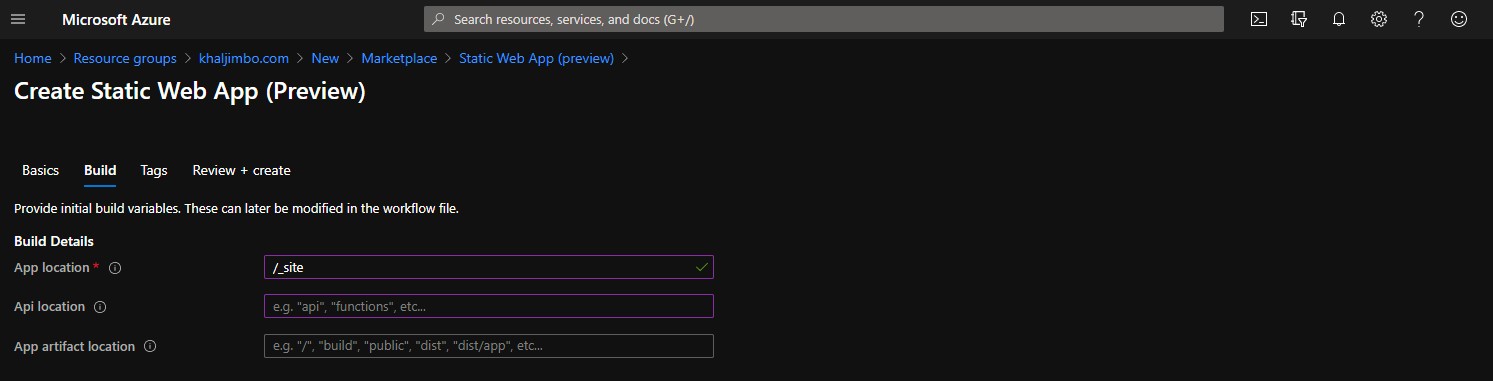
Once this is all filled out, click on the “Next: Build” button, here you will need to enter some more information, for the “App location” setting, change that to be “/_site” since that is where Jekyll builds your Website. Remove the “API location” value and the leave “App Artifact” blank.
Once this is all filled out, click on “Review + Create”, review the settings chosen then click on “Create”. This will now create your GitHub Action to deploy your site. It’s important to note that at this point your site won’t publish straight away as there is still some more editing in your GitHub Action file that you need to do, so you’ll need to pull the latest changes from your deployment branch down so you can edit the GitHub Action file.
Once you have pulled the latest changes you will see a .github\workflows folder in your editor with a .yml file. This is what will deploy your code to the Azure Static WebApp you have just created.
In this file, remove these lines:
- uses: actions/checkout@v2
  with:
    submodules: true
and replace them with:
- uses: actions/checkout@v2
  with:
    submodules: true
- name: Set up Ruby
  uses: ruby/setup-ruby@ec106b438a1ff6ff109590de34ddc62c540232e0
  with:
    ruby-version: 2.6
- name: Install dependencies
  run: bundle install
- name: Jekyll build
  run: jekyll build
- name: Build And Deploy
Pay special attention to the formatting here, yaml likes to have a particular structuring. Once this is edited, check your code in again and the GitHub action should run and push your code to your Azure Static WebApp for the world to start consuming.
Custom Domains
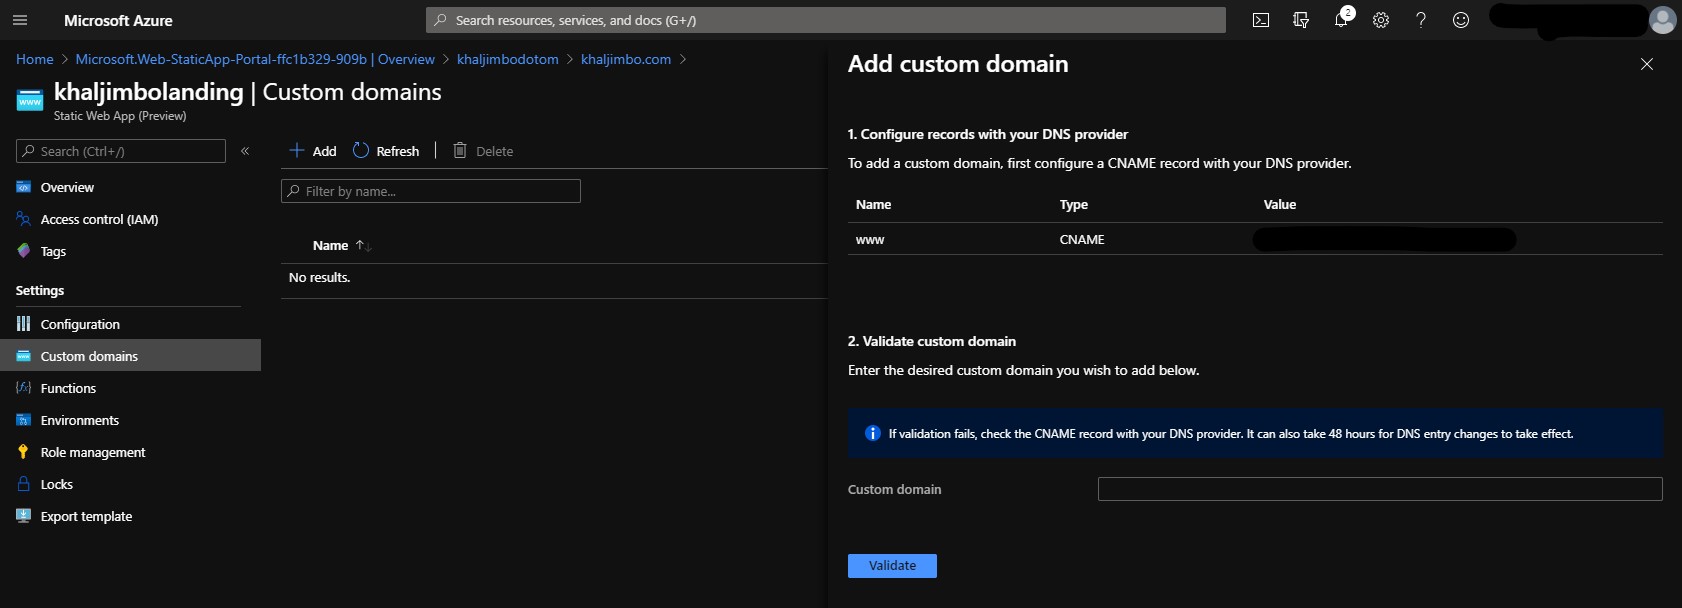
Azure Static WebApps also supports custom domains, you get a free certificate with your Static WebApp so don’t need to worry about that for now but binding to your domain is fairly simple too. Simply in your Azure Static WebApp settings section, click custom domain and you are provided with the relevant info to make the DNS changes on your domain.
There you have it, a blog using the Jekyll framework published on Azure Static WebApps using your own custom domain.
I hope this has helped you get started on hosting your own Jekyll based static sites in Azure Static WebApps.