
One of the best benefits to using Infrastructure as Code is the ability to use pre approved, rapidly deployable templates or “modules” that can be used over and over again with little manual interaction involved in standing up infrastructure. However, there is still quote a lot of manual interaction post deployment of said new infrastructure in that you now need to test your newly spun up environment. In this post, I’ll go through adding automated tests to your newly created environments to add confidence in what you have deployed, is what you wanted to have deployed. In software development, automated testing plays a huge part of the SDLC so why should it be any different with infrastructure development?
“Testing in production is a superpower. It’s our inability to acknowledge it that’s the trouble.” - Charity Majors - CTO Honeycomb.io -
Overview
Pester is a framework for PowerShell for writing and running tests, it can be used to test pretty much anything from PowerShell scripts, to whole environments to computer and database configuration. For more information on Pester and what it can do, take a look at the Pester website.
If we take this website for example, to test the Azure infrastructure it’s fairly simple, essentially I’d be looking to:
- Confirm my ResourceGroup is still there
- Confirm my Azure Static WebApp is still there
- Confirm it’s returning Http 200 responses
Take the ResourceGroup test requirement, this would essentially be:
- Get the state of the ResourceGroup
- Confirm the state of the ResourceGroup
- Continue to next step
Let’s take a look below at how this works.
The Tests
Pester works on the principal of Describe, Context, It, Should and Mock.
The below test is what I will run to confirm a few things about the resource group, first, that it exists by checking its provisioning state, that it is named how I expect it and lastly that there is only 1.
Describe "Azure Resource Group" {
    Context "It is created" {
        It "Should be provisioned successfully" {
            $rg.ProvisioningState | Should -Be "Succeeded"
        }
        It "Should be names correctly" {
            $rg.ResourceGroupName | Should -Be "khaljimbo.com"
        }
        It "There should be only 1" {
            $rg.Count | Should -Be "1"
        }
    }
}
Firstly the Resource Group details are declared in the $rg variable and I am able to access the objects inside the variable.
The tests are started by running the Invoke-Pester cmdlet with a path to your test file:
Invoke-Pester -Output Detailed -Path "C:\Tests\ResourceGroup.Tests.ps1"
This runs the test code above and gives an output of the tests that have run:
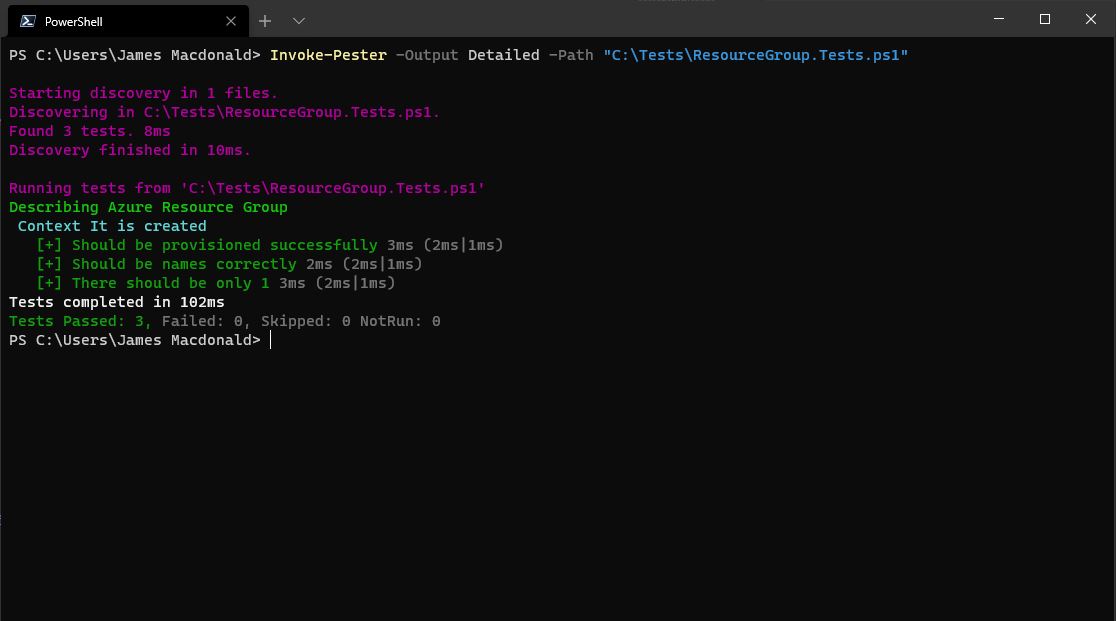
As you can see it is quite a detailed output that is given and the feed back is fairly quick too.
In Closing
As you can see it is fairly straightforward to get starting on testing your infrastructure with a little bit of PowerShell and the power that Pester brings to the table. This is only a very basic example of what can be done with it though. It can be used to automate the morning checks in your environment, confirm the state of your entire Cloud\DC, or even just something as simple as confirming your production workload virtual machines are still running and servicing requests.
Pester also has the ability to output the results into a .xml file so it can be used in CI\CD tooling.
In my next blog I’ll go through how I use Azure DevOps YAML Pipelines to deploy Terraform, in there I also include Pester to run tests and will go through how to add both the testing and the results to your pipelines.